It's been a few months since the "crafty" side of me has come out. I've been on craft overload since Halloween.
However, it's just YOUR luck, because I'm back in the saddle and off to an intense start thanks to one of my FAVORITE blogs,
FRUGAL FAMILY FUN BLOG!
Last week, Valerie and her daughter made this really cool penguin play set out of old stockings! Now in my household, penguins are our best friends. I mean hello, the background on my Mytouch is a bunch of rolly polley penguins. PO, our pet penguin also lives between the rails of our staircase (pictures can be found in other craft posts). So you can imagine when I saw her post, I couldn't wait to make one. Thanks Valerie for the inspiration.
If you are crafty and not following her blog, you should start now! Valerie also hosts "sewing in baby steps," for those of us who have sewing machines, and have no idea how to use them. I've taken 2 of her courses and have really enjoyed everything I've made (The Halloween Trick or Treat bags idea, came from her class.)
INTRODUCING, PENELOPE PENGUIN

Okay, so isn't she just ADORABLE? She even has a tail! She's made out of a "RIBBED" Nylon, knee sock. She was so cute and adorable, I decided she needed a mate.
And so, PAUL was born.
 Supplies:
1) Nylon Socks - 5 pairs for $5 dollars at Walmart. One sock makes one penguin.
2) Felt - $.37 a piece at Walmart. Black, White, Orange, Yellow, Red and Blue.
3) Thread - $.97 Walmart. Black and Blue. Don't forget to buy your needles if you don't have any. These are all sewn by hand.
4) Velcro - $1.27 at Walmart. I purchased the small self adhesive circles. This is what you use to attach the fish to the hands and beak.
5) Poly-Fil - $2.27 for that large bag at Walmart. You barely use any of this, so grab the smallest bag you can find. With this bag, I have a life-time supply.
STEP 1:

Measure approximately 7 inches from the toe of the sock down towards the heal and then cut. The toe will soon become the penguins head. Since Paul is a boy, I used a smooth knee sock as opposed to the ribbed one.
Step 2:

Stuff the sock with the Poly-Fil and pin the bottom closed. Sew the bottom closed.
Step 3:


Use a round object to draw out the penguins belly and 1/2 teaspoon to draw and cut out the eyes.

 Then free cut the feet (two orange triangles), the beak (One yellow, One Black and One Red triangle. The black and yellow should be the same size and the red one slightly smaller.)
Finally, cut out the tail and small black eyeballs.
Step 4:
 Pin all the parts onto the stuffed black sock and then sew each piece in place with a Whip Stitch. Once you have sewn on all the parts, then sew a Gather (Google it) stitch around the neck of the penguin to give it shape.

Don't forget the tail. I did, twice.
Step 5:

Free cut your flippers. For the male, I used four pieces of black felt and two pieces of white. Just to give him personality. Sew two black pieces together to give the flippers some "thickness." Then sew the smaller identical white piece to the front of the flipper with the Whip stitch.
So PAUL was born!

SOON THEY WILL HAVE BABIES!

If Chloe doesn't get to them first. Isn't she getting so big?

BTW: Feel free to cut out fish using the blue felt. Whip stitch two pieces of blue felt together part way then stuff with the poly-fil. Whip stitch it closed. Place a small piece of Velcro on the fish and on the penguins hand and inside of the black part of the beak.


.jpg)







 Yes, at 1 years old her eyes are still as blue as ever.
 Chloe is best described as, Ms. Priss, a snobby stuck up cat, however she can melt you with her eyes and when you cuddle with her she can put you to sleep with her soothing purr.


 After a week, Chloe and Emmitt are slowly becoming best friends.


 I have to admit as annoying as it is finding these all over the house. Even behind the toilets, it's pretty amusing to watch her roll around and actually do flips in the air as she plays with them.
 Of course, yes that's a pipe cleaner she is playing with in the laundry basket.
 Chloe's worse than having a 2nd child. It's no wonder why I'm always exhausted.


 Yes that is her ON TOP of ROMO bird's cage. Before she would just stalk him from the tables, now she is actually ON his cage. Oh HECK NO!!
  Yeah she's in our bathroom. Can you tell by the reading material and the toilet paper. I see you eye balling the toilet paper and I don't think so Missy!!
 I walk away for one second and she found the roll!! I am not pulling toilet paper out of her bung hole, with poop attached on it. I'm so over this!
 Introducing the BIG Guns!!
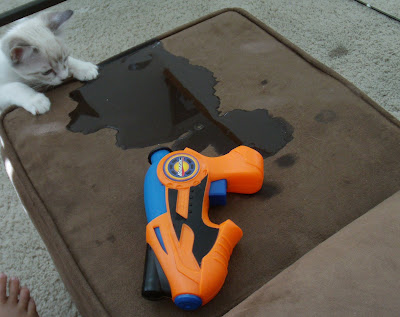 Then I lost her, where the heck could she have gone? She's like a ghost, I found her here only cause I spotted her baby blues. Can you see her? How did she get behind my blinds?
 Finally after all that she settled down on her condo for a nap.
 Why can't she be this quiet and calm all the time? Oh I just can't wait for her to wake up.