Halloween Advent Calendar
I wanted to use my stash on hand and not buy anything. I got this wonderful idea from Crafty Chicks. She created this wonderful Halloween Countdown Calendar for her kids. Check out her blog, she has so many amazing easy crafts. I put a spin on mine as hers is magnetic. I just wanted to use up the stuff I had on hand because I'm frugal like that. Okay so I know, it's not Spooktacular. I'm sorry but it was the best I could do with the materials I had on hand? I mean all the crafts turned out okay, right?

Step 1 - Punch out all of your circles. You also need two plain pieces of paper, I had some resume paper on hand (bright orange and yellow (not pictured)) to use as the larger circles. It's important to have this 2nd circle to make the picture pop off the green spooky paper. As you can see from the picture below some of the pictures blend with the background. BOOOO. lol

What the Heck are you talking about crazy lady? Keep on reading and you see what I mean.
Step 3 - Then I used this other cool hole punch I borrowed from D and hole punched the corner of the paper to feed through the Halloween Ribbon I used on the treat boxes. Tie the ribbon into a bow, but be careful not to rip the paper.
Step 5 - Cut a piece of ribbon to use as your marker for each day! Everyday you pull the ribbon out (say today is the 2nd) of the previous day (as shown below) and move it to number 2.
 Step 5 - Use ribbon to create a handle so you can hang it where ever you want. I just cut the Halloween ribbon and taped it to the back of the background.
Enjoy your new Advent Calendar! I wrote Happy Halloween down on the 31st.
Ummm HELLO LISA!! What is an Advent Calendar without the YUMMY Chocolate you are supposed to get everyday?
Patience People, Patience.
Again I wanted to use my stash on hand.
Here's how I made my cute little candy jar to go with the calendar. You can use anything you want, I was just in the mood to be "crafty!"
Step one - measure and wrap the paper all the way around the container (I kept the lid on so it would close without crushing the paper.) Use your hot glue gun to secure the paper around the container.
Step two - If you used solid paper like I did then you will want to decorate it. I used a cute sticker of a witch and an owl.
Step three - Tie the ribbon around the canister and fill with 31 pieces of candy or small little toys.
Instant Advent Candy Jar
 Now you are ready to count down the days until Halloween!!
What was that? You thought I was done writing. Oh no no no no no!! I'm not done, I told you this was a Halloween Spooktacular.
Next up, Mummy Gum. Yup Mummy Gum. I think they look more like Ghosts, but you can call them whatever you want.
They were a kinda pain to make, however they are cute though so I wanted to share. Plus who knows you might have an easier way of making them. I got this idea from Be Different act Normal's blog.
I purchased some packets of gum at Walmart, and tore up an old pillowcase. I could have just used white medical tape would have been way faster and easier, but again I was using what I had on hand. Just hot glue gun the strips of pillow case around the gum packets and add the eye balls. I think the pillowcase looks more real than the tape!!
Viola, Mummy or Ghost gum! I think I will hand these out to the kids with their treat boxes!

I also decorated my house and wanted to share with you my little cemetery scene. It's not spooktacular, but I like it when the lights are out it's so cool!
Thanks for reading my super long Halloween Spooktacular post!
(Feel free to steal any ideas from my blog and create your own crafts. However if you blog about it, be a sweetie and link up to my blog. I'd share the love if I stole from your blog) =)


.jpg)





 Don't look at me that way, just cause you are cute doesn't mean you can destroy all my fake plants!


 How cute is that, his teammate snuck in the picture. LOL HI JOHN!!
 Not so happy BOY during games 1 and 2, before he bowled his first strike.
 The Boy's team. They don't have a team name yet, we are still deciding! My nephew is in the blue bowling t-shirt. HI CHRISTOPHER!! Sorry I didn't get a picture of your face, next weekend though!
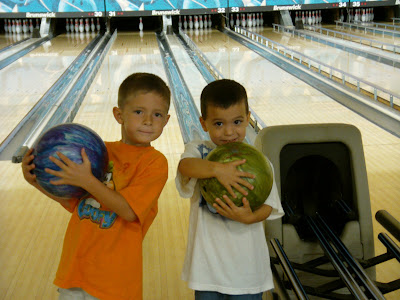 How cute are these two little teammates? My other nephew is on the left and my neighbors son on the right! They are in the, I believe, 6yrs and under league.


 (all items you see were purchased for a $1. No the whole lot wasn't a dollar, each item was $1)
 As per usual, they always look so much better in person then on camera. I just have a crappy blackberry cell phone!!

